- Carnivore - Predator
- Formerly known as THC HackSuite, Carnivore - Predator stands at the forefront of cutting-edge cybersecurity tools, redefining the landscape of penetration testing with unparalleled innovation. Designed to empower ethical hackers, security professionals, and enthusiasts alike, Carnivore - Predator is the ultimate Pentest CMS that puts you in command.
Carnivore Module Creation Part 2
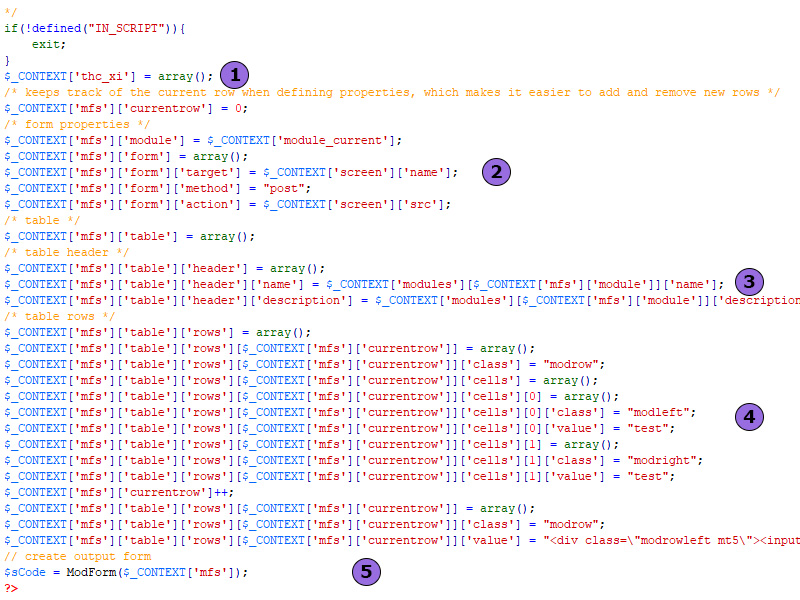
Upon completing the initial module creation process, let's examine the structure of the user interface through code:

- This variable is essential for ModGlue to store its data and facilitate interaction with other modules. It is advisable to name this variable after the module's folder. For instance, the module in question is named thc_xi.
- Configures the iframe responsible for receiving payloads from the index file. This configuration is mandatory when employing screen files.
- Generates the header of the index file, including the module's image, title, and description.
- Creates form elements. 'Modleft' is designated for field descriptions, while 'modright' is used for input fields. Each 'currentrow' signifies a new input and text field pair on a separate line. Three properties can be utilized: class, id, value.
- The ModForm processes the array, generates HTML, and stores it in $sCode.
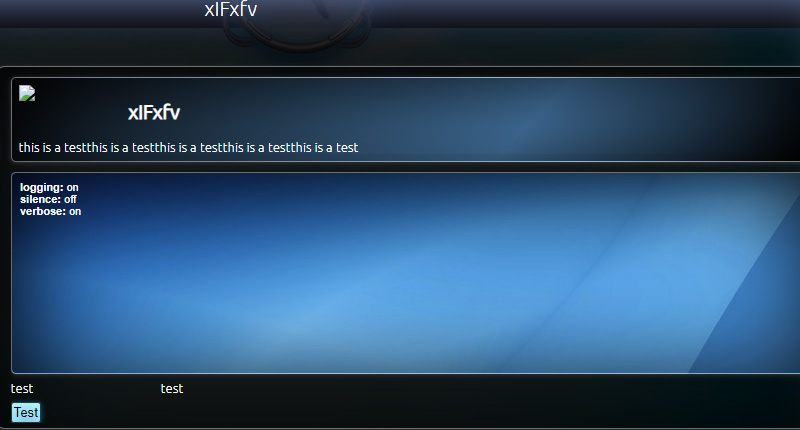
Upon accessing the module in your web browser, it will be displayed as illustrated below:

Although it may initially appear as gibberish, rest assured we will provide further clarification. Let's begin by focusing on adding an avatar image for this module. To proceed, navigate to the 'modules' link within the 'local sources' tab situated on the left-hand side of your screen.

Locate your module, where you'll notice an image indicating that no avatar has been found for this module.

You'll need an image that's 200x200 pixels and in PNG format. Return to the 'development' section to set the avatar. Click on the 'list all projects' link, as shown below:

Locate the module to which you want to upload an avatar and click on the 'avatar' link:

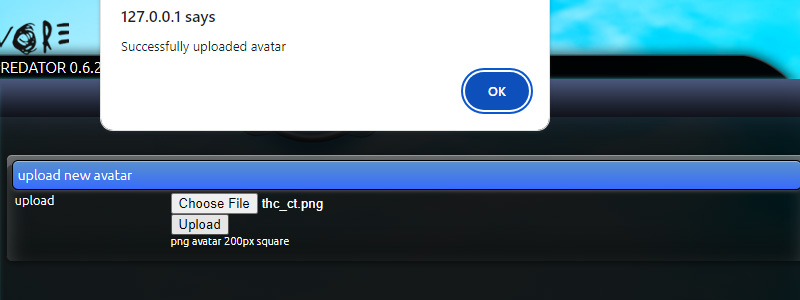
Select an appropriate image and upload it. If your image meets the specified requirements, you should receive a success message as shown below:
